


This project is quick, easy, and fun. I use binders to organize everything. I keep one for recipes, one for my calendar and to-do list, another one for sewing lesson information...the list goes on. Because I use them so much, I decided those binders needed to be a little bit more fun.
Shouldn't things we use everyday be pretty and make us happy? I think so.
With that in mind, here's a new tutorial on how to make your own Oilcloth Binder Jackets. They'll add a little razzle dazzle to your plain ole 3 ring binders.

Oilcloth is awesome. It's a special type of fabric (vinyl with a cotton mesh backing) that is extremely durable. It's waterproof and can be easily wiped clean, making it PERFECT for kitchen projects.
I've been dying to get my hands on some oilcloth ever since I saw Kelly,Miss Modern June herself, at the Country Living Fair. She's the oilcloth expert and she also sells oilcloth by the yard at her other Etsy store, Oilcloth Addict. That's where I got mine.
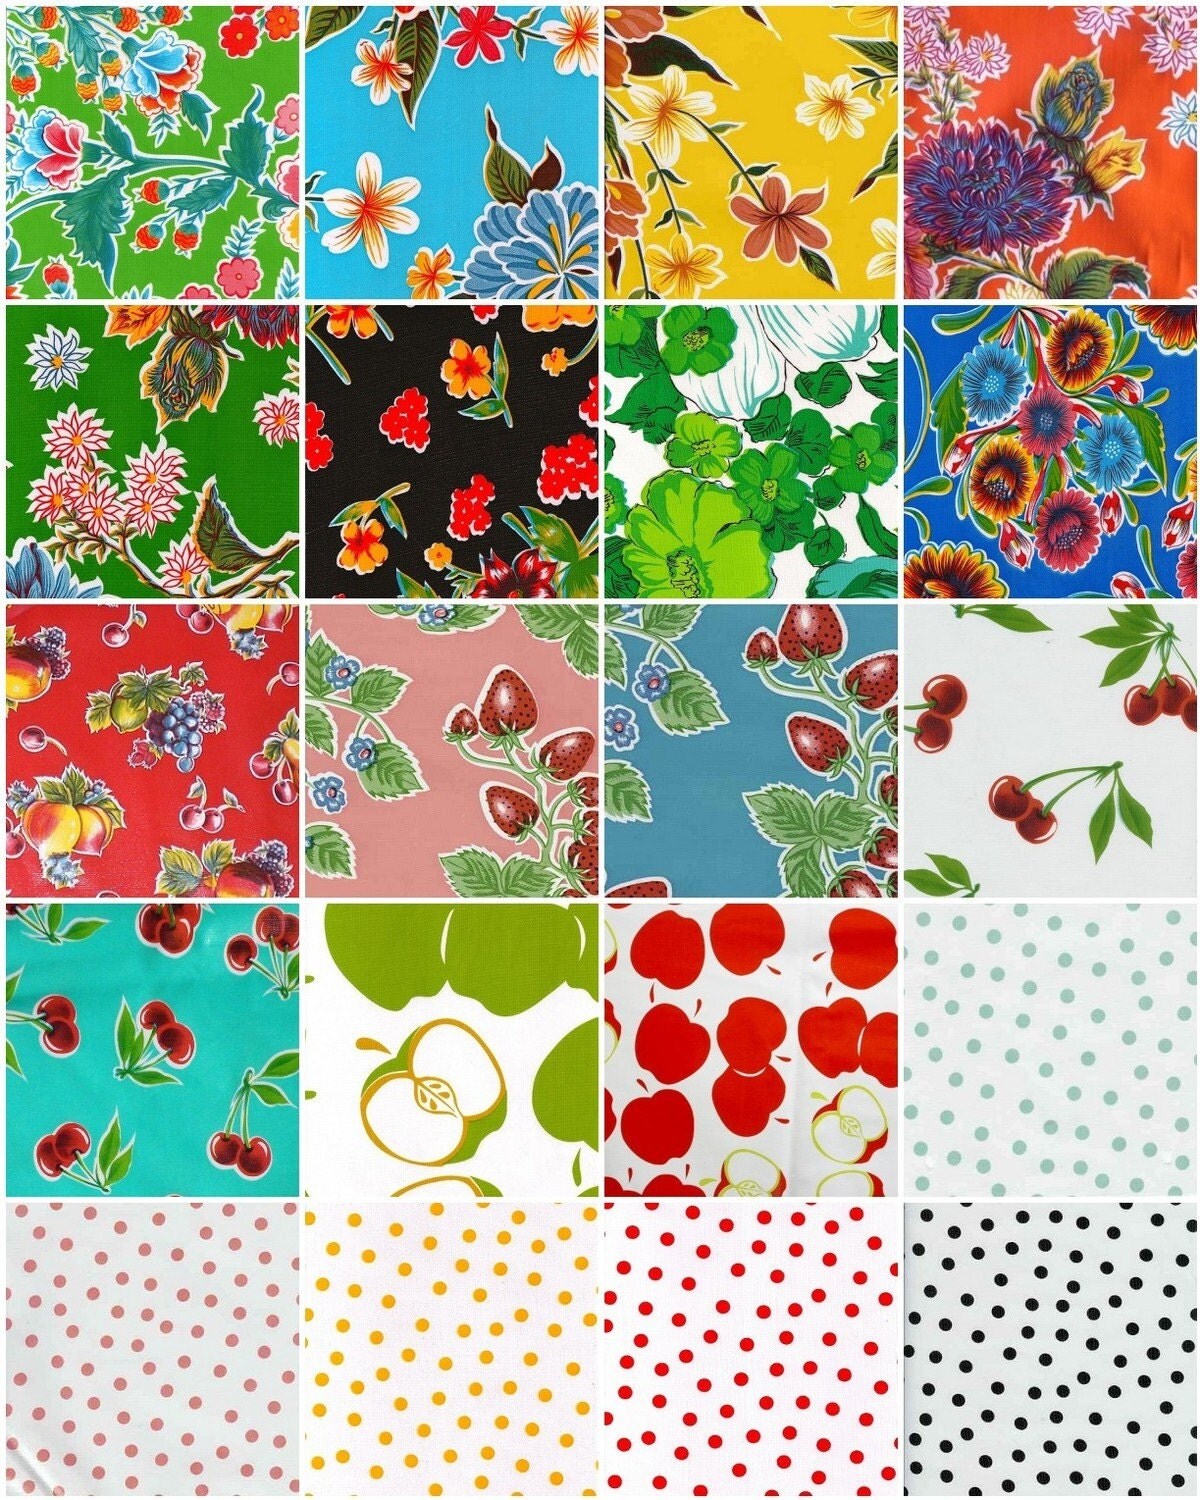
Look at just some of the selection of oilcloth she sells. I love the vintage look of the patterns and the bright colors.
This is a great "starter project" for working with oilcloth. Let's get started, shall we?
Here's what you'll need to make an Oilcloth Binder Jacket:
- 3 Ring Binder (I used a 2 inch width)
- 1/2 yard of oilcloth
- Yard Stick or Tape Measure
- Pencil
- Painters Tape (Masking Tape would also work)
- Sewing Machine and Coordinating Thread
First, open your binder out flat and measure from edge to edge. We'll call this the width.
Add 10 inches to the width of the binder.

Next, measure your binder from top to bottom. Let's call this the height.
Add 1/2 inch to the height of the binder.

So, now you will use your yard stick to cut out a rectangle of oilcloth that is Width + 10 inches and Height + 1/2 inch. For example if your binder was 26 inches wide and 12 inches tall, you would cut a rectangle that is 36 inches by 12 1/2 inches. Make sense?

Once you've cut your rectangle for the Binder Jacket, it's time to get ready to sew! Lay the rectangle flat with the wrong side facing up. Measure 5 inches from each end of the oilcloth.

Now tape the flap down using the painter's tape. Pins would make holes in the oilcloth, so we'll be using tape instead.

Do this to both sides.

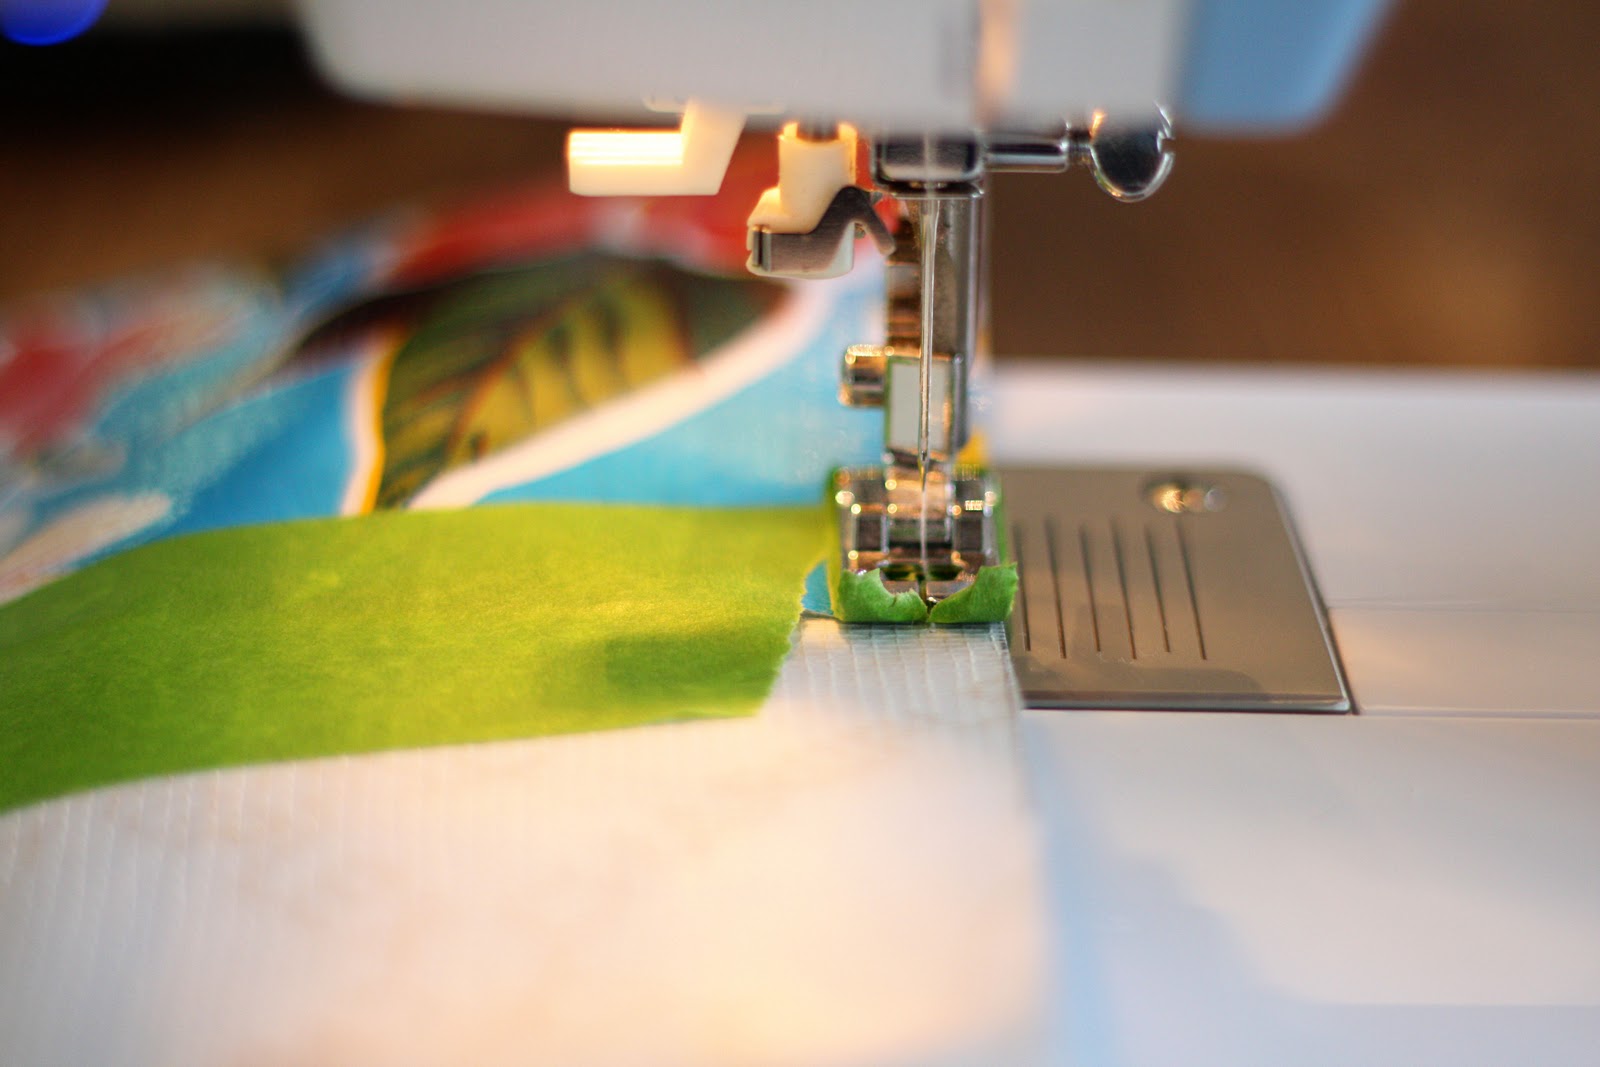
Now we're ready to sew! You'll need to make a little adjustment to your sewing machine before you sew with oilcloth. The vinyl is a bit sticky and would cling to the metal of the presser foot.
This is our solution via Oilcloth Addict: Simply cover the bottom of the pressure foot with tape. Use an Exacto knife to cut around the shape of the presser foot.

In the picture, I didn't cover the little toes of the presser foot, but I went back and did that later. Cover your toes. It'll help.
Alright, now let's get sewing.
Using a 1/4 inch seam allowance, sew along the bottom and top edges of the folded-over-five-inch-flap. The sewing is a little bit tough. I had to push and pull the fabric while I was sewing because the oil cloth is so thick. It's possible, though. Don't give up! Onward and upward!
Here's the finished project. Not the prettiest stitches in the world, but mission accomplished. Trim the string-a-lings.

Now, you can slip the Binder Jacket onto your binder.

Ta-to the-Dah.
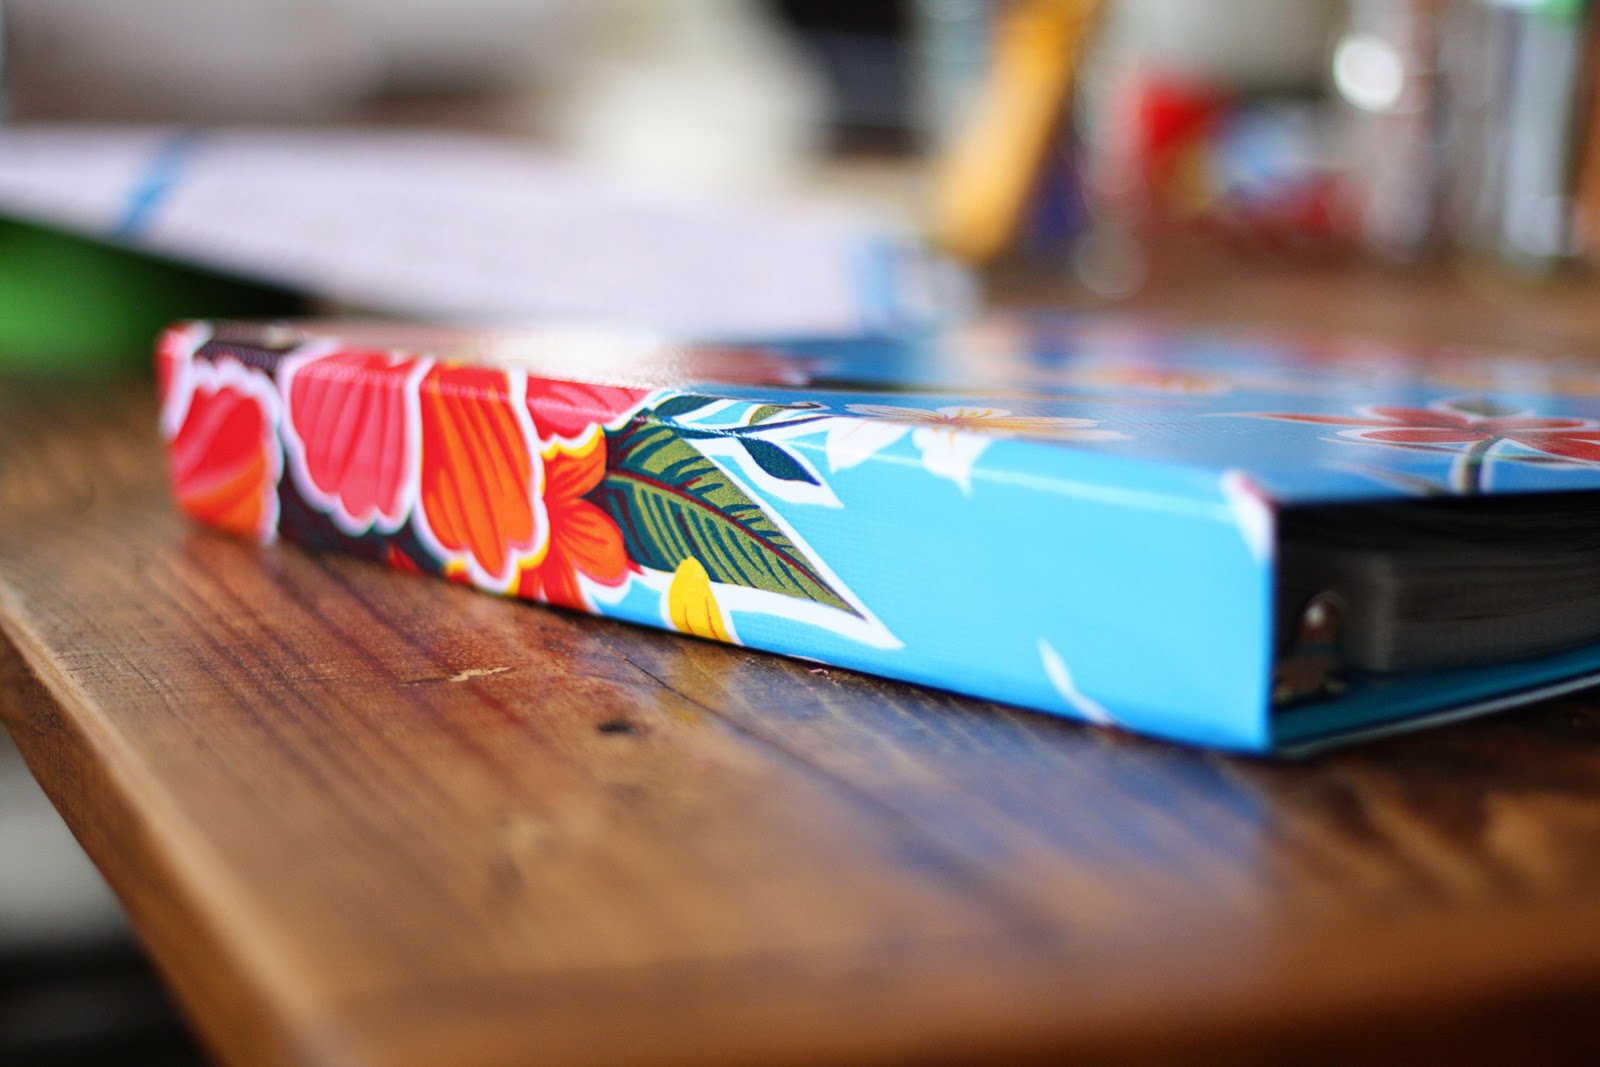
Fancy schmancy new binder.
These would be really fun for kid's school binders. You could even use the same technique to cover books. It'd be a great way to protect cookbooks from messy spills in the kitchen.
Love ya. Mean it.
Mel
Sharing with friends at:
LOVE this! When storing the binder vertical, does the bottom ever get worn, or I guess I should say, fray (b/c of the extra hanging past the actual binder)? Is oil cloth basically like "picnic" table covers?
ReplyDeleteYes! It's like picnic table covers...just a little thicker. The edges won't fray, I guess if you were REALLY rough, it might show some wear and tear eventually. The oilcloth is very durable, though :)
ReplyDeleteWhat a great idea. I just love the prints.
ReplyDeleteSusan
Those are some fine looking hands in this post! Great post, but that is the usual at this blogspot. Happy Proposal Anniversary.
ReplyDeleteI love this. I am going to have to try this one. I am your latest follower. I would love for you to come and check out my blog and follow me back at www.diybydesign.blogspot.com. Thanks so much.
ReplyDeleteLOVE this! i love oilcloth & 3 ring binders, but hate sewing.. i think maybe i could tackle sewing the straight lines in this though! :)
ReplyDeletefound you via skip to my lou! thanks for sharing!! :)
Very nice binder cover. I've never sewn with oilcloth. I think I'll give it a try.
ReplyDelete--Denise at Sly Needle
Great tutorial, love how it turned out. I am definitely putting this in my project list.
ReplyDeleteAnd, I am sharing it in my Idea List on my blog
www.StashHappy.com
Melissa.. I love all your posts... your mom and I often have a giggle or two over your energy and your enthusiasm for life! This project brought such special memories of oil cloth and its place in our home back in the middle of the last century! Our kitchen was painted gray... very trendy now.. but not so much for the 50s and 60s.. anyway, it was always a real treat to get new yardage of oil cloth for the kitchen table. My favorite was always the the brightly colored ones with big red apples! So glad you can still buy this and you've come up with a great use for it! Keep smiling... keep crafting and sewing.. keep sharing... love reading your blog.
ReplyDeleteAwesome!! I've got a post on Craft Gossip scheduled for tomorrow morning that links out to your tutorial. When it goes live, you can find it here:
ReplyDeletehttp://sewing.craftgossip.com/tutorial-oilcloth-cover-for-a-3-ring-binder/2013/08/06/
--Anne (Sewing Editor, Craft Gossip)
Great idea! A fun way to cover up old, beat-up binders, too. Thanks!
ReplyDelete