photo greener grass logo new_zpsew0enxyv.png  photo stitches copy_zpsp3oydyai.png

 photo about_zpshba0art5.png  photo shop_zps24sfyl5o.png  photo workshops_zpsycwnndbh.png  photo craft parties_zps5jskxbkf.png  photo tutorials_zpscfm8kqak.png  photo contact_zpsfhv565sj.png
Showing posts with label house. Show all posts

The Living Room

Around here we are full speed ahead on a lot of projects that have long been on the "to do" list. Baby's impending arrival has proven to be quite motivational. You know that feeling when company is coming over or you're hosting something at your house and you feel like you need to do 2 months worth of projects in 2 days?

Right, well now we've got someone coming to live with us. Permanently.
I've got to get my shiz together, people.

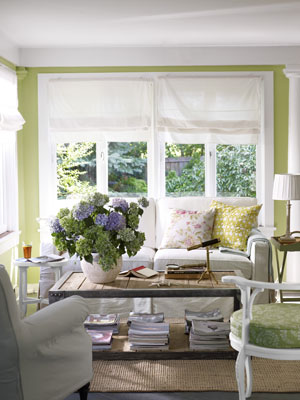
I thought, since I've got home remodeling on the brain, that I would show you some more before and after pictures from the house. We're working on some things upstairs, but let's take a look at the living room, shall we?

These are really old pictures (like from last fall) so somethings have changed. The color in these pictures is a little weird too, but what-cha-gonna-do, right?

You can check out the "before" pictures HERE.

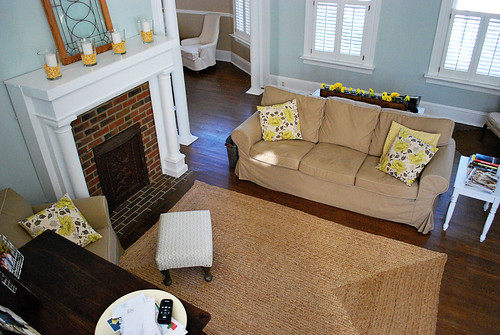
Here's the full room view from the crow's nest (a little landing on our stairs from whence you can see far and wide.)

livingroom3

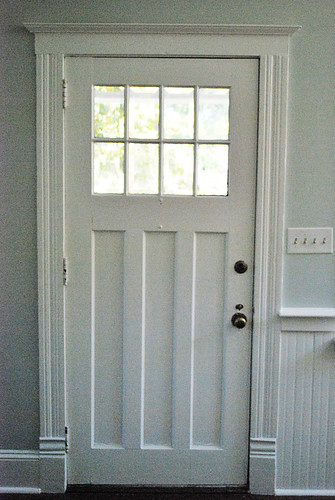
This is our front door that opens directly into the living room from the porch. If you are sleeping on the couch and someone knocks on this door it is super scary.
They can see you.
And you can see them.
There's no hiding.

livingroom1

This is the other side of the room. The stairs lead up to the bedrooms and are still in need of repair. The cabinet holds our television and is one of the first things that we bought when we closed on the house. It's from World Market via Atlanta's Craig's List. 

Don't be afraid to shop a nicer neighborhood's Craig's List. I'm not afraid to drive to Atlanta for cheap stuff and some people are getting rid of their furniture every time a new Pottery Barn Catalog comes out. 

Seriously.

livingroom4

Our couch and club chairs are from Ikea. We've had them for about 3 years now and have been pretty happy with them. Are they the most comfortable pieces of furniture ever? No. Does that stop us from taking a nap on the couch? No. You can make your own judgements about what that means about the couch... and us.

My Mama found the ottoman at a yard sale and I reupholstered it.

Please don't fail to notice that our fireplace cover has a family of deer on it.
I don't love it, and I don't hate it. I just think it's worth noticing.

livingroom2

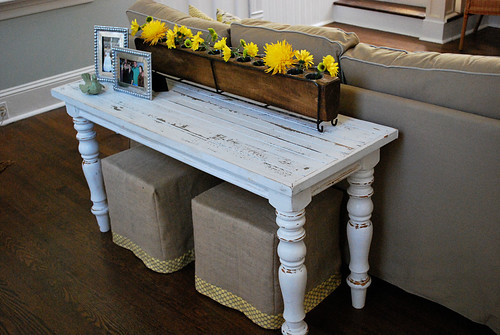
This little area is one of my favorites in this room. The table is from Scott's and the sugar mold holding the flowers is from the Country Living Fair.  The storage cubes under the table are those ugly jokers from Target that come in horrible colors. I slipcovered these in burlap and use them to hold our DVD's and my VHS collection.

I refuse to give up my VHS copy of "You've Got Mail." It's a non-negotiable.

livingroom5

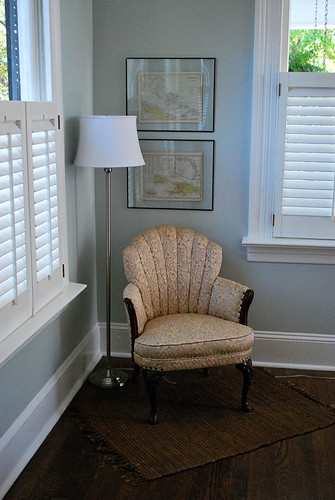
Another fun little nook in the room! Nana gave me this chair from her house and I love it! On the wall are a couple of vintage maps of places we went on our honeymoon that I found at an antique shop in Florida.

livingroom6

That's about it. Since these pictures were made, we got a coffee table. I painted it and I'm not sure if I love the color. Maybe I'll post a picture and we can all take a vote on if it needs a new hue! 

Back to work on the nursery!
mel

Current Residents: 2 People, 2 Dogs, 2 Chickens

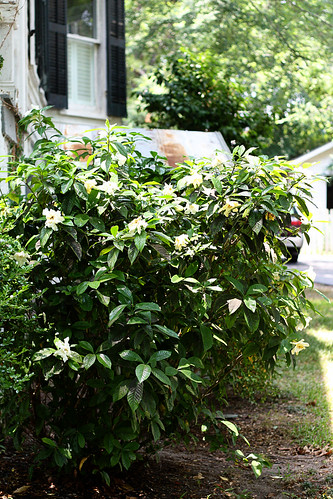
"Hey, Mel...what's that there behind your gardenia bush?"

chickens1

"Oh, nothing much...just my new chicken coop."

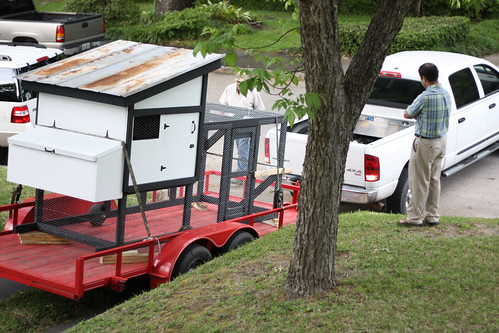
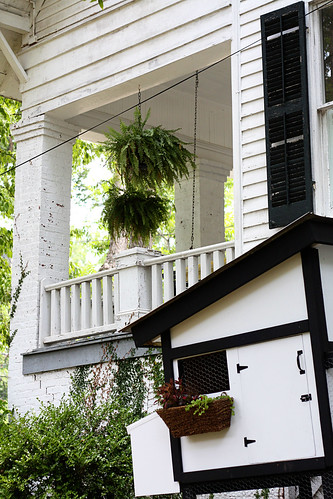
WHAT the WHAT? Yes, that's right. We are now the proud landlords to a couple of sweet little chickens. David and I have been thinking about the prospect of raising poultry for quite some time now, but when I casually mentioned the idea to my daddy, he showed up with this at my house mere days later.

chickens12

That's the way we get things done around here people. Ask and you shall receive!

Just kidding. I was so excited when my family showed up with an adorable chicken coop in tow...it was a total surprise. Daddy and Jonathon designed and built the coop just for us...they even painted it to match our house.

How cute is that, I ask you?

The coop has come to rest here, on the north side of our house. We originally placed it in the back yard, but it turns out that chickens and dogs are a risky combination, so we moved it here even at the risk of being those weirdos with chickens in their front yard.

chickens11

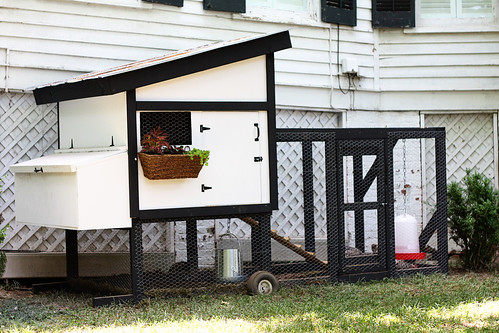
Notice the wheels on the coop? That's because this is technically called a "chicken tractor," meaning a mobile chicken coop. Daddy and Jon Jon made the coop movable because they weren't sure where we would put it. This way we can move it whenever necessary.

I'll show you all of the other neat-o features of Casa de Chicken, but first let's meet the ladies.

chickens10

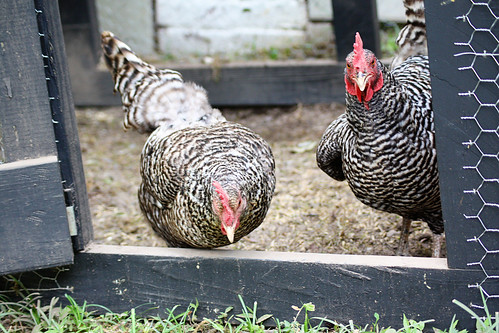
These are our two chickens, Flannery and Eudora. They are both Dominicker or Broad Rock hens. They are very sweet and they lay beautiful brown eggs. Daddy bought us grown chickens instead of tiny chicks so we've had the instant gratification of new chickens that already lay eggs.

Now, let's take the tour...

chickens11

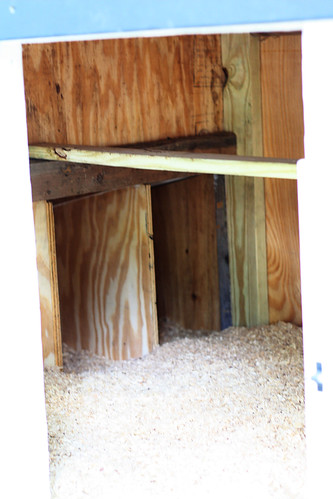
The part that looks like a little house is the actual coop. If you open the door to the coop, you'll find the roost pole, where the chickens sleep and two laying boxes, where the girls lay their eggs. The floor is covered in pine shavings that get changed to keep the coop nice and clean instead of smelly and gross.

chickens9

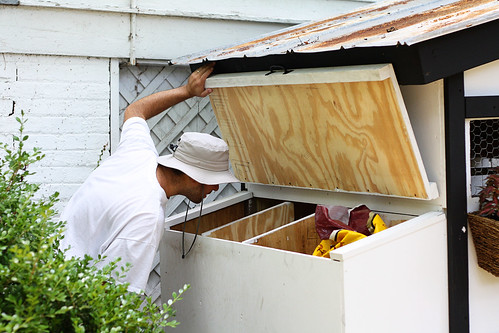
On the side of the coop, there's another door where we can easily access the laying boxes to grab our fresh eggs and there's also some storage space where we keep the chickies' food.

Here's David checking for eggs.

chickens8

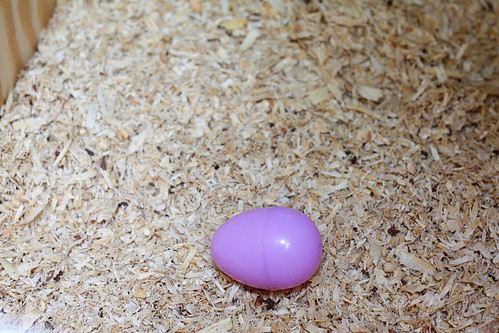
In each laying box, we placed a plastic Easter Egg (per Daddy's instruction) so the ladies would know where to lay their eggs. It works, too! Everyday there's a nice brown egg right next to this purple one.

chickens2

The chickens can come in and out of the coop using their little ladder/board walk. The chicken wire area is called the run and that's where the chickens spend most of their day, scratching and pecking around in the dirt.

chickens7

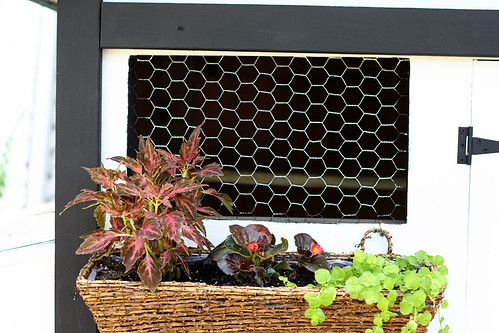
I decided to make the coop a little more cottage-y with the addition of a window box. The window is for ventilation inside the coop, but I think Eudora and Flannery really appreciate the nice view, too.

chickens6

There's another door on the run so we can come in and out of the coop to change the water and food or grab a chicken when necessary.

chickens4

And when it's open the girls can wander around for some for some fresh grass. Free Range, for goodness sake.

chickens5

So here we are...chickens in our front yard...fresh eggs everyday...neighbors coming to stare...children "bocking" loudly beneath our windows...

chickens3

We wouldn't want it any other way!
Mel

Do you have chickens? Do you want chickens? We'd love to answer any questions that we can!

Dill Pickle Double Take

Guess what paint color makes an appearance in the new May Issue of Country Living?


That's right Country Living...I'm glad you caught on.


Look who's ahead of the curve, yall.
(For once...)

By the way, if you haven't picked up a Country Living Magazine in a while, you should check it out. It's very cool and cottage-y. It has bargains and DIY galore. And they pick awesome paint colors.

 Duh.
Mel

Shed a Little Light on the Situation

I've been in the market for some new table lamps.

I liked this little lamp just fine, but he needed replacing. It's actually one of two that David had before we got married. They were part of his dowry. The other one is in the kitchen. Unfortunately, Big A dwarfed the lamp so much that he lost all sense of self-respect. He just couldn't hold his own next to such a character. 


"I don't get no respect." (Pulls collar)

So the other day when I had some extra dollhairs in my pocket, I decided to find something a little more appropriate. Dave-O went with me to Target and supported me as I agonized between short and tall lamp bases...square and drum shaped shades...white paper or fabric covered shades. The poor guy spent an hour holding up different lamps so I could look at them.  Bless his heart.

I'm sure he wished that he could have sent Paper Dave in his stead.

In the end, I pulled the trigger on this tall handsome fella.


Oh-so-much better. The shade is covered in burlap with jute trim, which adds a little texture to the otherwise very simple buffet lamp.


The lamp and shade came from Target, if ya wanted to know, and I'm really happy with them both. I think this small change made a big difference in this little nook of the dining room.

I love lamps. We RARELY use overhead lighting at Casa Dark.
Where's your favorite place to pick up a new lamp?

mel

Sweet Slipcover Success

Those of you who have been following our home renovation posts may remember that I had several unfinished projects in the dining room. One of those projects stood out like a sore thumb.


That un-slip covered yellow chair has been giving me the stink eye for over a year.  Nana gave us those chairs, when they were headed toward a certain death at the county dump. They are from circa 1967 and are really nice sturdy chairs, despite their dated look, which made them excellent candidates for slipcovers

They originally had a tufted back and some buttons on the arms. I removed the back cushions, all the buttons, and the skirts from the bottom of the chairs to give them a more modern and simple look. I originally wanted to have the chairs reupholstered, but it was going to be too pricey for me.

Necessity breeds invention, people.

I got brave and decided that I would slipcover them (and that Nana and Mama would help me.) We did the first chair at my parents' house and then I brought the pair home to do the second one by myself.

But the truth is that slip covering is not for the faint of heart. I left the chair alone for a year, hoping that someone would volunteer to come help or do it for me. I just couldn't bring myself to tackle the second one, which is very uncharacteristic of me...I really like to finish projects.

But this week I kicked it into high gear and decided that it was time to get this thing DONE!


I got out all of my supplies and patterns and started cutting and sewing like a crazy woman.

This second chair turned out to be a much more simple task than I had imagined. Since I had already made the pattern and had the experience of completing one slip cover tucked in my belt, I found this go round much easier.

For the record I made my pattern using an old sheet and I bought my slipcover fabric from Wal-Mart. It is a natural colored cotton-duck fabric that is inexpensive and available anywhere. I think I paid 4 dollars a yard for it...maybe less. I don't remember... it was so long ago.

I chose a durable inexpensive material, because I needed so much yardage-- this project was suppose to save me money, remember? I probably spent less than $65 to slipcover both chairs. Not bad, huh?


After some quality time spent with this old girl over several days (and after one year) here we are:
Two slip covered chairs. [Cue the Hallelujah Chorus]


Adios, mustard yellow velvet! Your time is up!

All I have left to do is hem the skirt. I just couldn't wait any longer to show you.
"See Mama! See Nana! I told you I was getting it done! Aren't you proud?"


This one actually looks much better than the first one that I sewed oh so long ago. It fits tighter and the seams are much more neat. I did some fiiiiine sewing right here, y'all.
Fine. Sewing. IfIdosaysomyself.


All the chairs need now is a pillow or two. I stole this one from the laundry room just to get the full effect.

Have you ever made a slipcover? Would you like to? If you have basic sewing skills, a little time and patience, as well as a heart full of courage, you could definitely slipcover!

Here are some resources that I highly recommend:
  • Kristi at Pink and Polka Dot is known as the "Slipcover Whisperer." She has an ebook tutorial for crafting your own custom slipcover. I didn't use this, but I've seen some amazing results from people using her instructions.


I also recommend a lot of chocolate cake and a can-do attitude. Maybe a helpful Mama and Nana, too.
Go forth and slipcover.
Melissa


Sharing this with friends at:

Greener Grass Kitchen Tour

Oh lawsy...re-doing this kitchen nearly did us in. Do you remember what it looked like? Red toile wallpaper? Cream cabinets? Red details?


Missing floor tiles and red gingham curtains?


Grungy pantry? Disgusting outdoor carpet?


 Is any of this ringing a bell?

Although the kitchen looked yucky and busy, we knew from the very first time we saw the house that it had great potential. The cabinets and counter tops were pretty new. The floor was a ceramic tile that was salvageable, thanks to the previous owners leaving all of the extra tile from the original installation under the house. The kitchen is fairly large for a house as old as this one, and the natural light from two huge windows makes it a very pleasant place to be....which is good because, as we all know, everyone always ends up in the kitchen.

It's the heart of the home...
And our home needed a transplant.

Here's what it looks like now.


Fresh and bright.

David's dad helped us repair the floor tiles after my daddy and Jon Jon repaired some parts of the foundation of the house when we first bought it.
We lived with the red until we had the time, and strength of heart, to begin the long process of stripping the wall paper off of our 13 foot tall walls and painting the cabinets.


Mama and Nana helped us take down the wall paper using a steamer that we rented from Home Depot. If you have wallpaper that you need to remove, this will be the best 25 dollars you ever spend. Trust me. David's sister, Amy, came to visit, with her sister in law, Celia, and helped us in the kitchen, as well.

Painting cabinets is a beast of a job and I really dislike it, but it can drastically change the look of your kitchen for a very minimal amount of money. I think our kitchen is a great example of that. Always paint the doors and inside the cabinets...I know you don't want to, but you'll be glad that you did.

Do it once. Do it right.

Something that I don't think I've mentioned here before is that because our house is so old, everything is painted with oil based paint. This means that we have to use an oil based paint or primer over the existing paint or it will not stick. I learned this the hard way. It's not a huge deal, but painting with oil based paint is a little more difficult and fumey than latex paint, making this cabinet painting task even more daunting.

If you are wondering if your cabinets or house are painted with oil based paint, you can put rubbing alcohol on a cloth and rub it on the paint in a small, hidden area. If the paint bubbles or peels, it is latex paint. If nothing happens, that means it's oil based.

Good luck.
The paint on the cabinets is Benjamin Moore Bright White. It's the color that we used on the trim in the whole house. We painted the trim and cabinets with Kilz oil based primer first.

The paint color is...get this...Benjamin Moore DILL PICKLE! How great is that for a kitchen? The pictures do not show the color in its truest form, but it's bright and fresh while still being a little subdued.


I love this table in our kitchen. It's a great place to be.

The table was a housewarming/Easter gift from David's parents. I had been eyeing it in Ballard Designs and knew it would be the perfect size for our space. Sue Anne surprised me and bought it for us. It's one of the first pieces of furniture we had in the house. It's a great place to sit and talk with people while I cook in the kitchen, or eat breakfast, and it gives me a little extra prep space because it's counter height.

Sadly, this perfect little table is no longer available. What gives, Ballard?


Cute tea towel from Anthro. A gift from a sweet friend.


My beloved Kitchen aid...maker of marshmallows, cakes, pizza dough, and fresh pasta.
Nana gave this to me for a wedding gift.


I love the glass front cabinets for our dishes. They are Vietri Cucina Fresca, in case you're interested. It's our wedding china. I love that every plate and bowl and cup is a gift from someone special and getting to look at them all the time makes me very happy. The paint color for the kitchen was inspired by the dishes, because I knew we wanted them to be displayed.

We get a lot of awesome gifts, right?
I know. We are constantly overwhelmed by the generosity of our friends and family.
The framed art leaning against the back splash (above) and on the wall in other pictures is a set called "Birds in the Kitchen" and it's from a wonderful Etsy shop called Lucky Blue Bird Art. Each of the pictures are sweet silhouettes of kitchen appliances with birds perched on them. Love it.


Would you like to have that last piece of cake? I keep the knife in there so when I walk by I can have a little nibble, or as I like to say, "even up the edges" Who can sleep when there's uneven cake in the house? Not me. That's for sure.


We'll let's check out the pantry, but I must warn you...there's some pretty horrific fluorescent lighting going on in there. Please know that it's not really neon green. It just looks like that in these pictures.


This pantry is my happy place. It's probably the very first "room" in the house that we finished. Sometimes David would be looking for me around the house and find me just sitting on the floor in the pantry admiring the perfectly painted selves and beautiful baskets full of organized food.

You do what it takes to get you through.

Many people ask me how we can be so patient to live here while we fix up the house one room at a time. That's how...sitting in the pantry...being happy with what is done and how lovely it is...choosing to dwell on what we've accomplished, rather than the other 1500 square feet that are not done yet.


I store all of my dry goods in big glass jars with labels that I made from chalkboard vinyl. Practical? Maybe. Maybe not. Pretty? Oh yes. Very pretty indeed.


I think it helps me to stay organized, though and to know what and how much of something I have at a glance. I think when your kitchen is a pleasant place, you will use it more.


On one wall of the pantry, there was an old boarded over vent-thingy. That's as descriptive as I can get for you. It looked like a window, but it wasn't. It was ugly. Not wanting to stare at something ugly everyday, I decided to cover it with sheet metal and make it into a little message station. It's perfect for grocery lists, reminders, and notes.

Lemons to lemonade, friends.


This is a little doo-hickey that I roped my brother into helping me make a very long time ago. It hung over my desk in college for notes and mementos and now it hangs in my pantry and hold my aprons and miscellaneous hang-able stuff, like my graduated biscuit cutters.

What?
Where do you put your graduated biscuit cutters?
Oh...
That's a weird thing to have?
Who knew?


Before

After

So that's where we are in life, dear ones. The heart of our home is a much more pleasant place for us to be now and we love every second that we get to spend in it...from morning coffee to dinner with friends.

Y'all come on over if you decide you want that piece of cake.
Melissa


Sharing this with friends at:
Blogging tips