photo greener grass logo new_zpsew0enxyv.png  photo stitches copy_zpsp3oydyai.png

 photo about_zpshba0art5.png  photo shop_zps24sfyl5o.png  photo workshops_zpsycwnndbh.png  photo craft parties_zps5jskxbkf.png  photo tutorials_zpscfm8kqak.png  photo contact_zpsfhv565sj.png
Showing posts with label recipes. Show all posts

Easy Peasy Hot and Cheesy Spinach Dip

This weekend I went to a baby shower with some of my sweet sorority sisters. It was so much fun to catch up and celebrate the coming arrival of a sweet baby.

The shower was adorable and the food was wonderful, particularly a hot spinach and artichoke dip. It reminded me of this recipe and made me wonder why I don't make this 3 times a week.

It's so good and so easy.

It's even better with artichokes, but David no likey the artichokes.

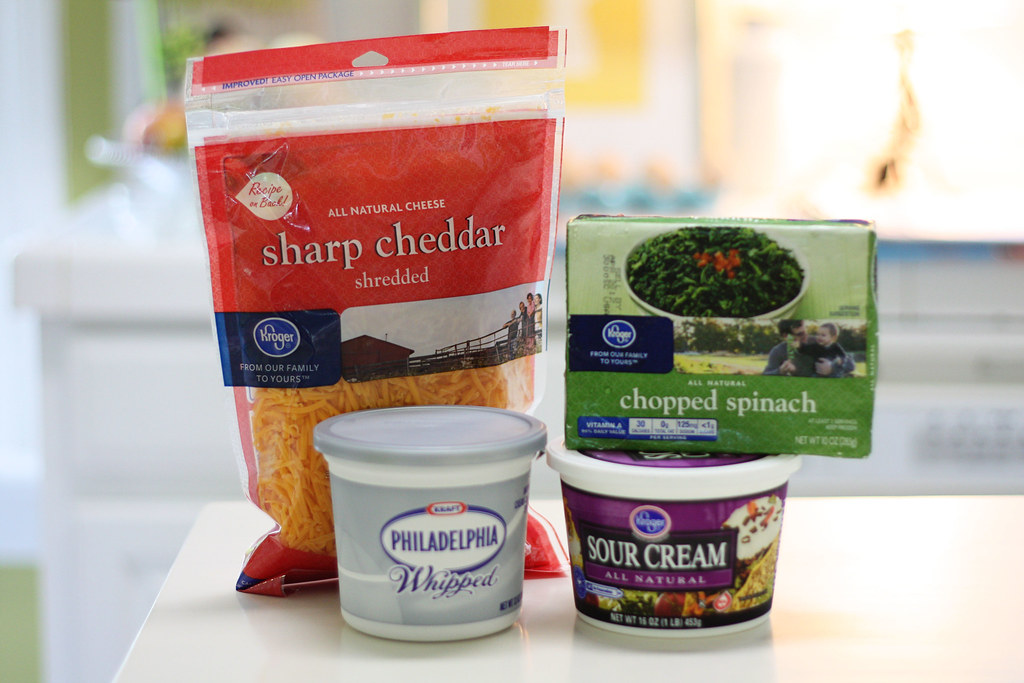
Here's what you'll need:

10 oz box of frozen chopped spinach- thawed
1/2 cup of whipped cream cheese
3/4 cup of sour cream
1 cup of grated Cheddar cheese, plus more for sprinkling on top
1/2 teaspoon of kosher salt (regular salt is fine, too)
1/4 teaspoon of pepper
(Optional, and not included here, is a 12 oz jar of artichokes- chopped)


spinachdip9

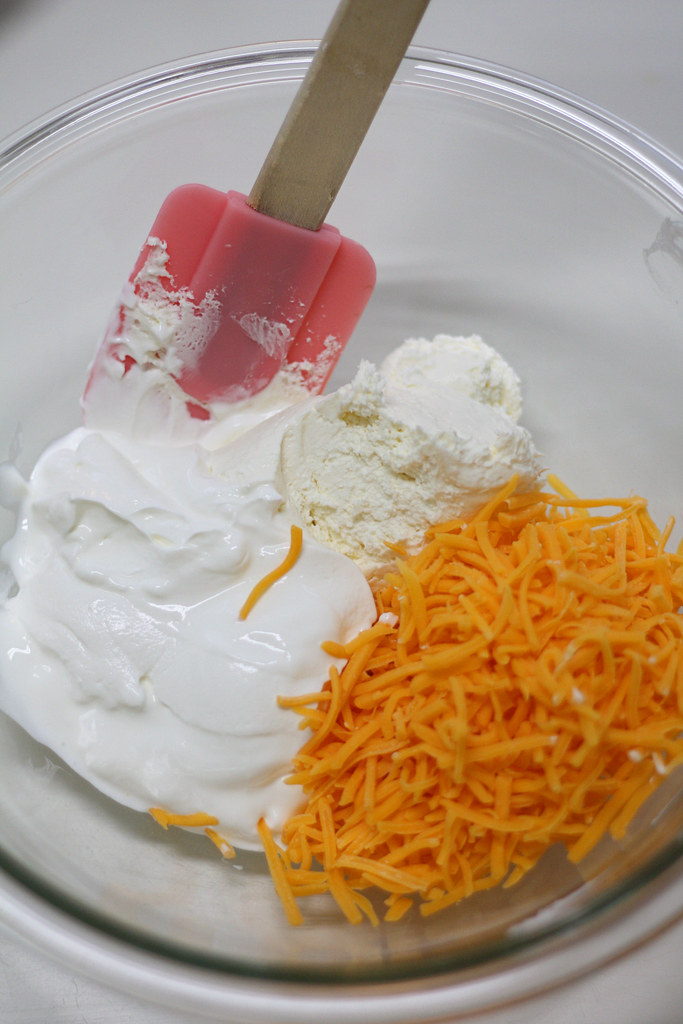
First, combine your cream cheese, sour cream, and cheese. You can use regular cream cheese, if that's what you have handy, but the whipped variety mixes a little easier.

spinachdip8

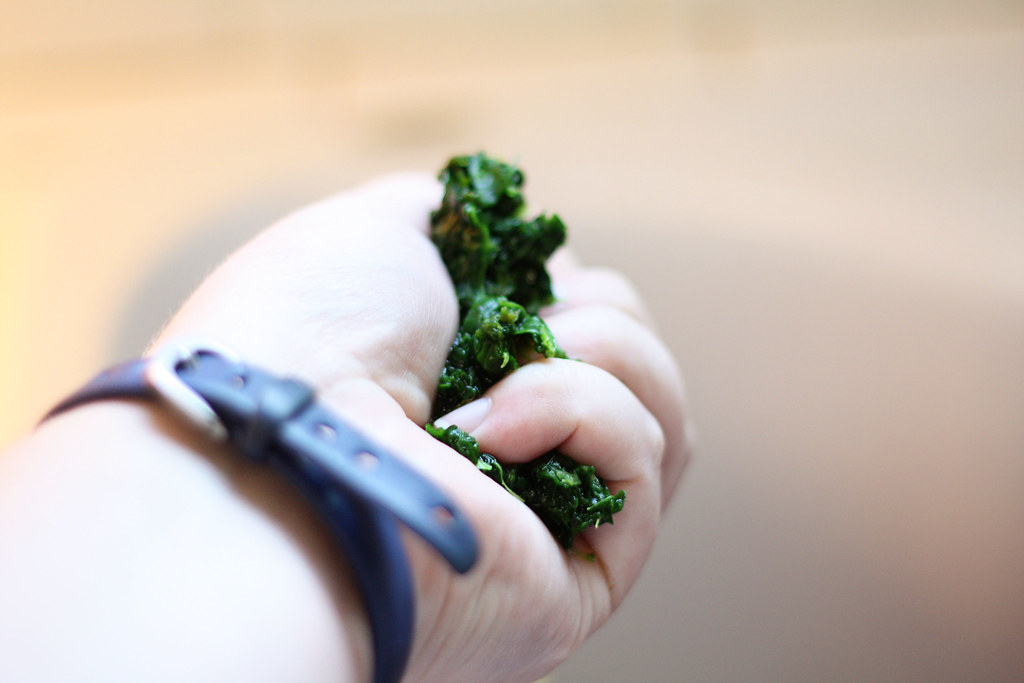
Before you add the spinach, you'll need to remove all of the excess water. There is a suprising amount hiding in there! This part is both gross and gratifying. Grab up some of your spinach, and squeeze the green water out of it.
spinachdip7

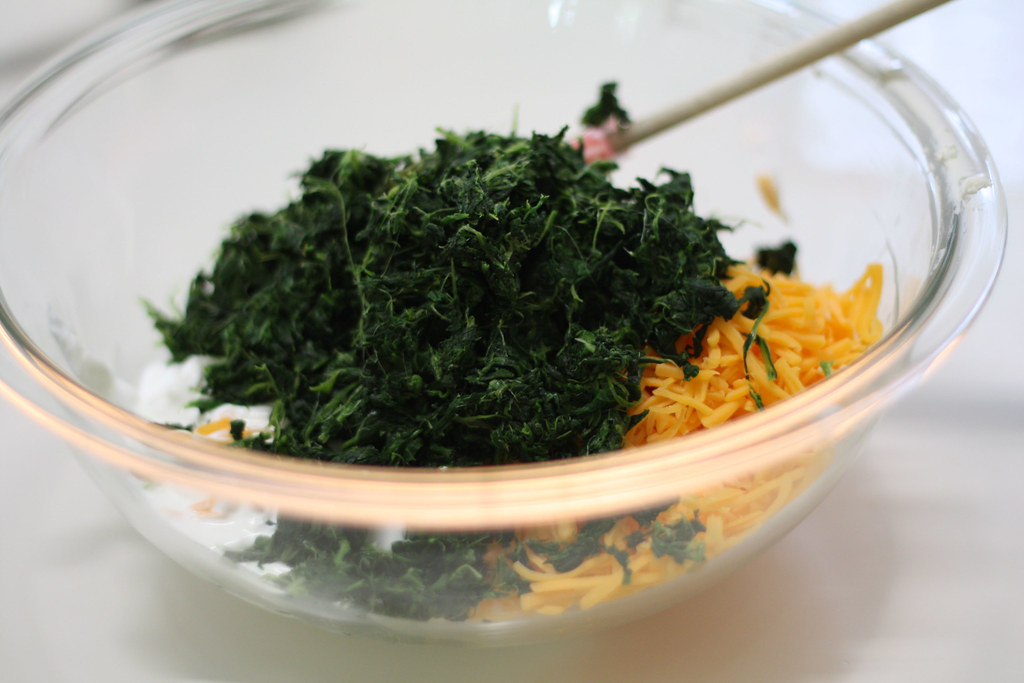
Fluff the spinach back up and add it to the other ingredients. If you want to add artichokes, now's the time.

spinachdip10

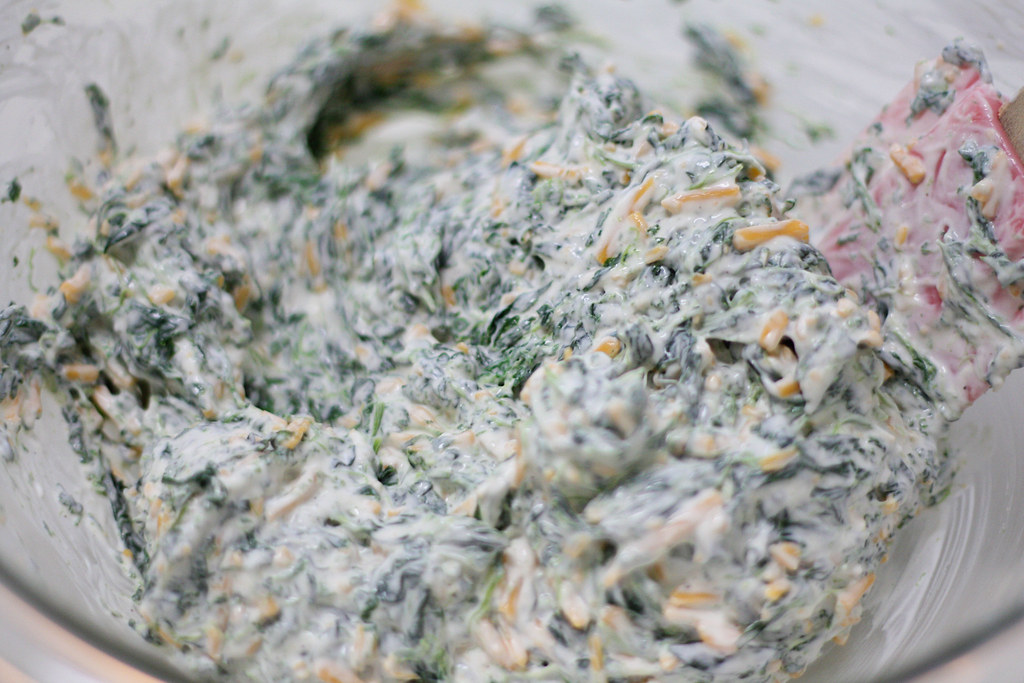
Add salt and pepper, then mix everything up.

spinachdip6

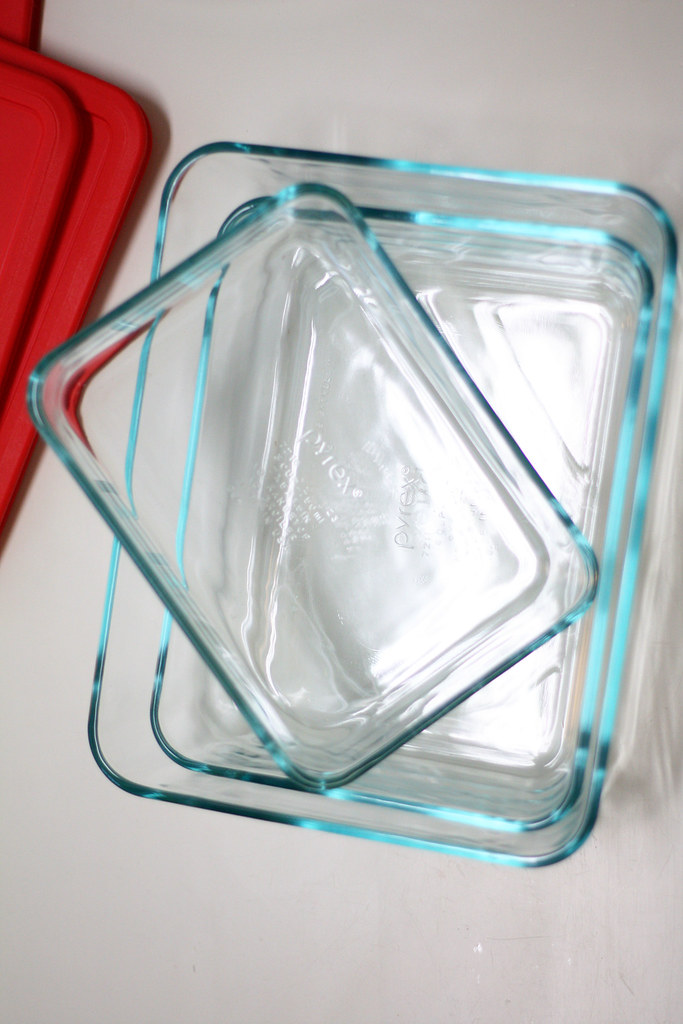
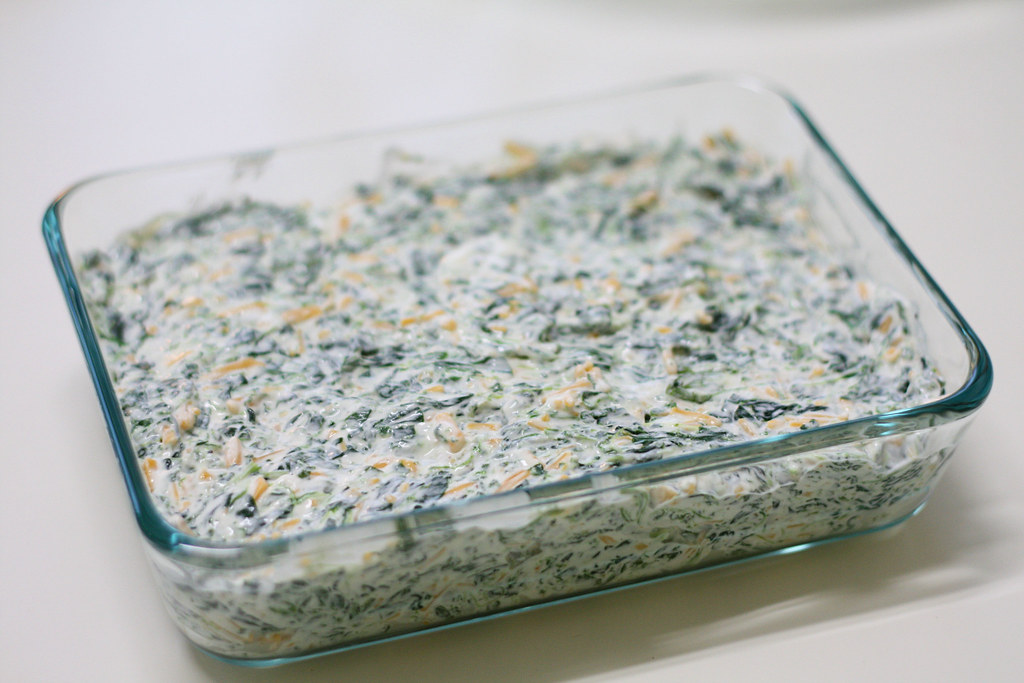
Add the mixture into a teeny tiny baking dish. Look how little mine is! I think it's a 3 cup. It's the baby out of a set of nesting Pyrexes.

spinachdip5

Nesting Pyrexes... nesting bowls... nesting chickens... We have a lot of nesting around here.

spinachdip4

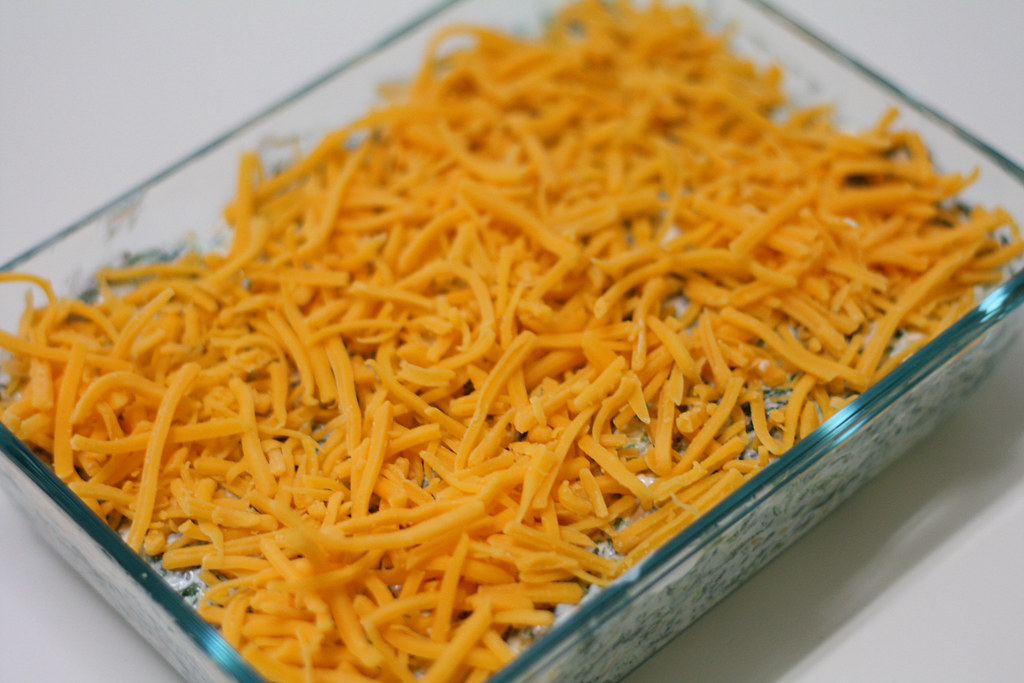
Sprinkle the top with cheese. I went a little overboard with the cheese here. Don't be like me.

spinachdip3

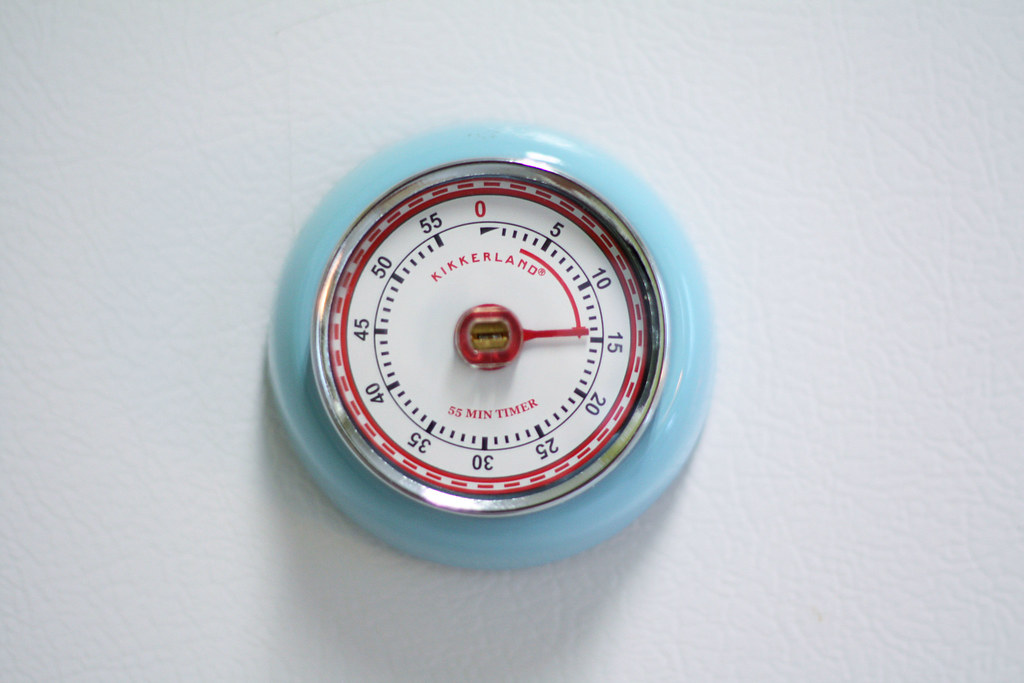
Bake at 400 degrees for about 15 minutes, until golden and heated through.

spinachdip2

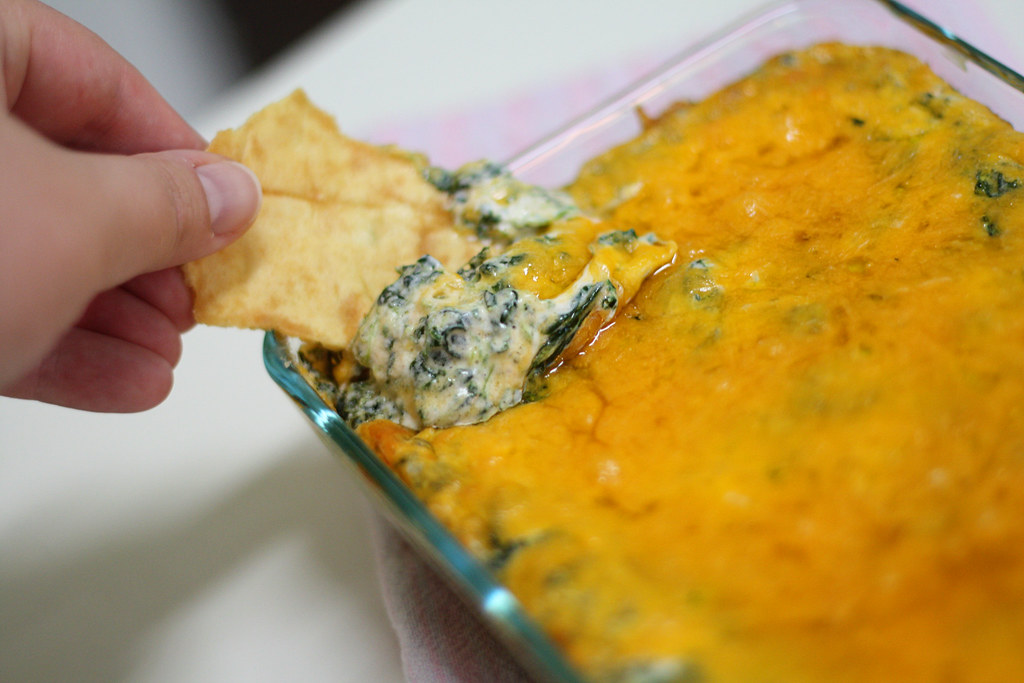
Serve with pita chips, bread, or tortilla chips while still warm.

spinachdip1_edited-1

You will not regret it.

Serve it at parties, or if your like me, don't wait for a party and eat it for lunch.
Call me crazy, but I'd like to stuff a chicken with it.

Not Eudora or Flannery, of course.

I'm glad they don't read the blog.
mel, lover of all things dip related


Sharing with friends at Tip Junkie

A Peck of Peppers


Check out all of these Green Bell Peppers and Jalapenos that came out of our garden yesterday. And there are still p-lenty still growing on the plants. The peppers are about the only thing left in the garden at this point of the summer. In just a few weeks it will be time to start thinking about a fall crop. I'm especially excited about planting some pumpkins this year!

With all of these peppers ready, now is a perfect time to make Pepper Jelly.


I'll also use a few of the jalapenos to make Pioneer Woman's Salsa, which is oh-so-good.

Do you have any good pepper recipes? I'm going to need some new ways to use these!
mel

Window Box Herb Garden 2011

Last year, we enjoyed our herb garden more than nearly anything else we planted.

This year, we decided that if a few herbs were good then more would certainly be better.
We need MORE basil! MORE parsley! More cilantro!
We are greedy herb-eaters.
 So we expanded.
Without further adieu, here is the Dark Family 2010 Herb Garden.

herbgarden5

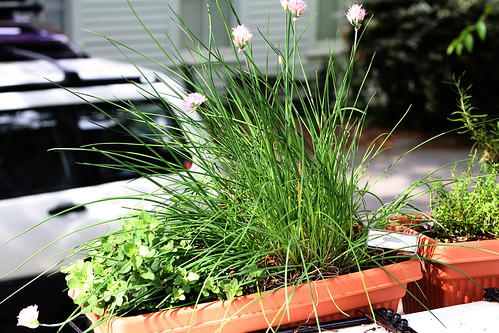
First off, we have a little oregano...yummy in Italian dishes. The oregano shares a home with some chives that survived from last year. They braved the winter and lived to tell about it. [Insert Brittney Spears, "Stronger"]

herbgarden3

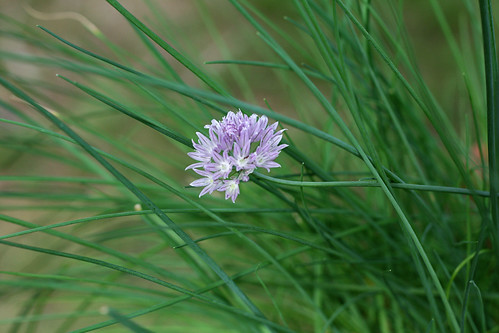
Chives have beautiful purple flowers that smell amazing!

herbgarden4

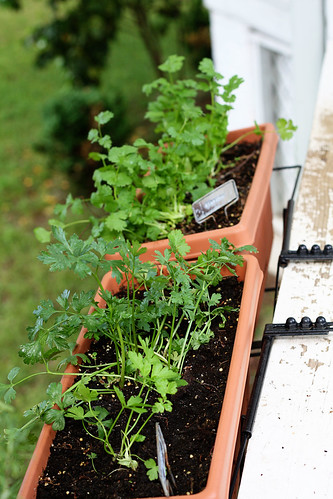
Living next door, we have parsley and cilantro which we grew from seeds in our greenhouse. They started out so teeny tiny...it's hard to believe how much they've grown.

(Also, if you look closely to the right of those plants, you can see where Jack has beat the H-E-double-hockey-sticks out of our newly painted deck railing by jumping up on it to bark at passing joggers and their pesky little dogs.)

herbgarden2

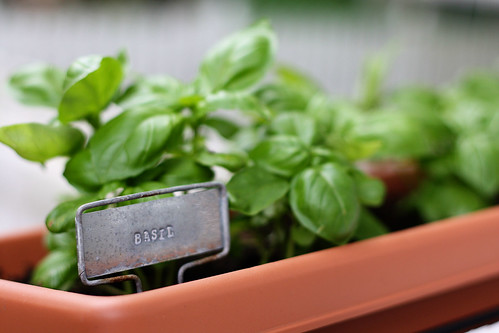
This is David's favorite. We have a whole planter box full of basil (that we also started from seeds). David asks me everyday if I think we are growing enough. He's extremely worried about the imminent threat of a basil shortage...as we all should be.

herbgarden1

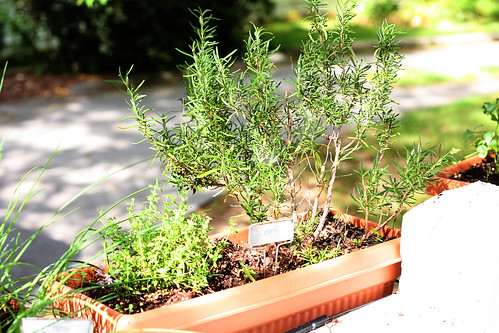
And lastly here's the rosemary and thyme. The thyme is a new plant, but the rosemary is also a winter survivor. [Insert Beyonce's "Survivor"].

A lot of these herbs are still a little too small to use much, but we have high hopes that in a few weeks they'll be ready-for-the-cooking.

Here's a recipe that we've dipped into the herb garden for a few times this season already:

***Herbed Chicken***
Ingredients
  • 3 tablespoons extra-virgin olive oil
  • 2 tablespoons minced shallots (I use onions)
  • 1 tablespoon chopped fresh rosemary
  • 2 teaspoons chopped fresh thyme
  • 2 garlic cloves, minced
  • 4 (6-ounce) skinless, boneless chicken breast halves
  • 1/2 teaspoon salt
  • 1/4 teaspoon black pepper
  • Cooking spray
Combine olive oil, minced shallots, rosemary, thyme, and minced garlic in a zip-top plastic bag. Add chicken breast halves. Marinate in the refrigerator 2 hours. Remove chicken from bag; sprinkle with salt and pepper. Brush the herb mixture evenly over chicken. Heat a grill pan over medium-high heat. Coat pan with cooking spray. Add chicken to pan; cook for 6 minutes on each side or until done. (We cook ours on our outdoor grill and it is SO yummy!)

(Recipe from Cooking Light)

Do you have a herb garden? What are you growing?
mel

French Toast Casserole

I have a great recipe for you today, friends. It's one that marries decadent deliciousness with make-ahead ease. If you were to come spend the night at my house, odds are that I would feed you this for breakfast.

Then you would never want to leave in hopes I would feed you more. It's. that. good.

Nana and I developed this French Toast Casserole in our test kitchens after I went to the beach with some friends and one of them made a lip-smacking French Toast Strata. Yum. It was inspirational. So we made this simple version of French Toast Yumminess that  men, women, children, and dogs alike will all love. Trust me.

It's really easy and quick. Shall we make French Toast Casserole?  Yes. Yes, we shall.

Here's what you need:


1 stick of butter
3/4 cup brown sugar
1 1/2 lb. Loaf of French Bread, day old bread is best
(most loaves are 16 oz. or 1 pound, so you may have to buy 2 loaves)
8 eggs
1 cup milk
1 Tablespoon Vanilla
1/2 teaspoon Cinnamon
1/8 teaspoon salt
Powdered Sugar
(Not pictured and Optional is 1/2 cup Pecans...me no likey the nuts)

Alright, let's get crack-a-lackin.
First melt one stick of butter in the microwave.

"That really melts my butter" - Dolly Parton, Steel Magnolias

Now measure 3/4 cup of brown sugar. When you measure brown sugar, proper procedure is to pack the brown sugar into your measuring cup very tightly, smashing it with a spoon. Just thought you might be interested.

Then combine the brown sugar and butter.


Brown Sugar Island.

Mix the sugar and butter together so that they are well combined. The butter will slightly melt the brown sugar and you'll end up with a syrupy mixture of goodness.


Pour the mixture into the bottom of greased 9x13 glass baking dish.


Next is the fun part. Cut your loaf of bread into 2 inch-ish cubes. I always just tear the bread. I think it looks rustic and charming. And I'm too lazy to get out my cutting board. Tear or cut, it's your choice. Put the bread in the baking dish on top of the brown sugar mixture.


When you get all the bread in the baking dish, you may have to smush it down a little to make it all fit. That's fine. It'll be better for it.

By the way, this recipe works best with day old bread, but if your loaf is fresh that's fine. Try to leave it out on the counter an hour or two uncovered so it will get just a little harder.


Next, crack 8 eggs in a bowl and lightly beat them with a whisk or fork.
Add 1 cup of milk to the eggs.


Now for the good stuff. I'm using my awesome Spice House Cinnamon and Double Strength Vanilla, from Sha and Smatty. Any Vanilla and Cinnamon will do, but these special spices  really brought a great flavor to the French Toast.


Add a Tablespoon of Vanilla.


And 1/2 teaspoon of Cinnamon. I add more like a whole teaspoon. I sprinkle Cinnamon with reckless abandon and apologize to no one.


Lastly, add a dash of salt. How much is a dash, you say? Check out my cutesy cool measuring spoons. Dash, Smidge, and Pinch.
I think that's what I'm going to name my kids.


If you don't have cutesy measuring spoons, use about an 1/8 of a teaspoon of salt.


Whisk. Whisk. Whisk.
Until well blended.


Pour your egg and milk mixture over the bread.


(If you wanted to add the Pecans, now would be the time to sprinkle them over the top of the bread.)

Cover and refrigerate for at least 2 hours or up to 24. This gives the bread time to soak up the yummy sugar on the bottom of the dish and the rich eggs and milk that you poured over the top. Good things come to those who wait.

(I was making mine for supper, so you'll see that these next pictures are a little dark. Don't be alarmed. It's just night time. Who's ready for some longer sunny days? Me too.)

Bake at 350 degrees for 30-35 minutes. When it's ready, the top should be brown and a bit crunchy.


The inside will be soft and delicious.
Sprinkle liberally with powdered sugar and serve piping hot.


I like to serve French Toast Casserole with sausage or bacon and fruit. This recipe serves 6-8 happy people.

Love you. Mean it.
Mel Belle

Sharing this recipe with friends at:

Christmas Project #4

Hey Yaaaall.

I have another project for you today. I've been doing lots of projects lately and I want to share them all, but I feel like I haven't been telling you about our life lately, either.

So here are a few things happening as of late:

1. The dogs are staying inside a lot because it's so cold outside. They sleep approximately 21 hours a day. Jack is desperately trying to get my tomato shaped pin cushion because he thinks it's a ball. He wants it bad. Real bad. He also burned his tongue yesterday on the oven. I opened it. He licked it.

2. I have been entertaining David and the dogs by doing interpretive dances to Josh Groban Christmas Music whilst I cook supper. There's a lot of Groban on my Celine Dion Holiday Pandora Station, but that's OK...I've got a lot of good moves.

3.I'm drinking so much Homemade Hot Chocolate. We'll be lucky if we have ANY to give away. My friend, AC, came over and we made Homemade Marshmallows to go with the Hot Chocolate. They are the bomb.

4. David is running fervently despite the cold. He wants to run a 5k at Brasstown Bald (the highest mountain in GA) this weekend. He says it's the hardest 5k in Georgia or America or something like that. Sometimes I laugh at the fact that we're together. "I'll be in the car with the heater on and knitting, Babe. See ya when I see ya."

5. I am currently mourning the loss of President David Palmer. This past weekend, we bundled up in front of the TV and started Season 5 of "24," because it was simply too cold and rainy to do anything else. I love Jacky B. I can't help myself. I'm practicing my sleeper hold on Jack (my dog, not to be confused with Jack Bauer on TV, whom I could never subdue). I've also been whipping out an imaginary gun in Jack's face and he always looks surprised and scared...he plays a great victim.

Enough about us, here's the next project: Hot Pepper Jelly!

If you have never had Pepper Jelly, you're missing out. I use it as an appetizer, though it can be eaten in many ways. I pour Pepper Jelly over a block of cream cheese and serve it with Ritz Crackers. It is amazing. It is green and festive. It is deliciously southern.

Sometimes you have to convince people to try it because it's green. I can understand that, but once people do try it, they love it. It's a great stand-by, go-to appetizer because it's quick and easy.

Pepper Jelly is really sweet with just a tiny bit of heat to it, and when that taste mixes with a salty cracker and smooth cream cheese -gosh- Amazing things happen.

Serve this at your next party or give it as a gift ,and you'll find yourself saying things like "Merry Merry Y'all!" or "I do declare!" or "Bless your heart."

It's like a Christmas Miracle.

A word of encouragement: This is a really, really easy jelly to make. If you've never made jelly before, I suggest you start here. It's a super simple recipe, you just have to put on your big girl panties, garner all of your courage, and get ready to boil down some sugar.

Come on, Suga,' you can do it!

(All of these pictures were taken in Fitzgerald, in case you were wondering whose kitchen this is. Nana and I like to make Pepper Jelly together. )

Here's what you need:
  • 4 large green bell peppers
  • 3-4 fresh jalapenos
  • 1 1/2 cups apple cider vinegar
  • 6 cups sugar
  • 1 1.75 oz box of Sure Gel (or fruit pectin of your choice)
  • 4 drops green food coloring
  • 6 (1/2-pint) canning jars with lids
This recipe yields 6 1/2 pint jars of jelly and will take about 30 minutes to make from start to finish.

Before you begin, sterilize your jars. This sounds scary and complicated. I think I'm legally obligated to tell you to follow the USDA guidelines for sterilizing a sealing jars, but I also want to tell you that I don't follow them, myself. I'm a Renegade Canner.

I can the same way that my Mama, my Nana, my Mamoo, and on and on have canned. It has always worked and hasn't made anyone sick, so far. We just bend the rules a little. If you feel more comfortable following the USDA guidelines, by all means do that.

Or you can be like me and tell the government to back up off your jelly makin' methods!

Can at your own risk, people.
But it's really not risky.
It's easy and fun.

OK, back to jar sterilization. Here's how I sterilize my jars. Are you ready? Are you sure? OK.
I run the jars through the dishwasher.
It's as easy as that. The water in your dishwasher is hot enough to make them sterile.
Check. Moving on...

Wash your all of your peppers and roughly chop them, being sure to remove all (or at least most) of the white membrane and seeds inside.


Next, put all the peppers in the food processor and pulse until they are chopped up very fine, but not pureed. You want your jelly to have a little texture. Or I do, anyway. You'll have to search your heart to find out what you really want.


Combine the chopped pepper mixture, 1 1/2 cups of Apple Cider Vinegar, and Sure Gel in a large sauce pan and bring it to a rolling boil. You will know it's a "rolling boil" by stirring the pot. If you stir the pot a bit and it stops boiling, then it's not ready. If you stir the pot and it keeps on boiling anyway, then you're rollin' baby!

**Tip: If your mixture is really foamy (like this) you can add 1 tablespoon of butter to the pot. It will get rid of the foam. I don't know why or how, but it works!**


When the mixture reaches a rolling boil, then add 4 drops of green food coloring and 6 cups of sugar.

Yeah, you read that right. 6 cups. It's jelly people...it's made from sugar!


Return to a boil, and keep boiling for 1 minute.

**If you use a different type of pectin, follow the instructions on the box for boiling time, etc**

Remove the pot from the heat.
Use a funnel and a ladle to pour the mixture into your sterilized jars. You DO NOT want to fill the jars all the way to the top. You have to leave some empty space in the top of the jar. It's called head space. Leave about 1/2 inch of head space in each of the jars when you fill them.

Wipe any spills from the rims with a warm wet cloth, and screw on the lids.


Now, here's another Renegade Canner trick. The USDA suggests a method for sealing the jars, but I don't do that. We turn the jars upside down with the hot mixture inside. The heat from the jelly will seal the lids of the jars. As they begin to cool (after 15-30 minutes), you can turn the jars back over, so the jelly will thicken properly in the bottom of the jars rather than in the top.

Make sure that the jars are probably sealed by pressing on the lid. If the lid moves up and down, making a popping noise, then it didn't seal. Turn it back over for a bit longer.


You know that your jars ARE properly sealed if they lids do not pop up and down or make any noise when you press them.

Congrats, Renegade Canner! Your mission was successful.

I'm dressing these little guys up and giving them as Christmas presents. I made enough to stock my pantry, too.

**Tip: Don't double the recipe. If you want to make multiple batches, you have to make one recipe at a time. It's so quick and easy, though, so you won't mind**


I used the same cards that I made for my Homemade Hot Cocoa gifts and tied them on with some ribbon and ric-rak scraps.


It's a quick Christmas Gift.
It's a great anytime gift.
It's a yummy have-on-hand appetizer.
It will make you feel more Southern, and everybody wants that, right?

Make Pepper Jelly and join the ranks of Renegade Canners!
Melissa

Linking up to:

Christmas Project #3

Christmas Project #3 is one of my favorites- Homemade Hot Cocoa Mix. It's a sweet and easy gift for friends and neighbors, and it's great to have on hand for Christmas company. Once you make this, you'll never go back to Swiss Miss. Actually, that's not true. I still use Swiss Miss sometimes. But this is like the difference between Blue Box Macaroni and yummy homemade baked mac and cheese. Given the choice, you would surely go homemade.

Here's what you need:


25.6 oz. of dry milk
1 lb powder sugar
16 oz. plain non-dairy coffee creamer
16 oz. Nesquik

In the picture, I have enough ingredients to make double the recipe...I needed lots of Hot Cocoa. To give you an idea of how much this makes, I doubled the recipe and ended up with 6 pint jars  and 7 quart jars of dry mix.

The directions are simple; find a really big bowl (sometimes I use my stockpot), dump all of these dry ingredients together, and stir, stir, stir. Make sure it's mixed together really well and you're done! Easy Peasy.

To use your mix, Add 5 tablespoons of Hot Cocoa Mixture to 8 oz. of hot water.

Now let's make this into a cute gift...this is the fun part! I decant my Cocoa Mix into pint and quart mason jars. Then, get out all of your ribbon scraps and papers and pens and stamps...or whatever you have.

I'm happiest when my dining table looks like this:


I used a 1.5 inch circle punch to make my gift tags. I stamped them with a Christmas tree stamp that I got a few years ago from the Michael's $1 bin. Obviously my stamp pad is dried up...just roll with it. We'll make do.


I used a regular hole punch in the top for the ribbon. To jazz up the stamp a bit, I went over the tree with a green marker and hit the stars with a little yellow dot. It made it a little cheerier.


I cut squares of some red fabric with pinking shears on the lid and tied the tags on with green ribbon. I wrote a greeting on the front of the tags and on the back, are the instructions to make a cup of cocoa.


This is a great gift to have on hand to pass out to friends and neighbors. It will warm their hands and their heart. I've been snuggling up with a quilt and a mug every night.

Today, I'm going to try my hand at Barefoot Contessa's Homemade Marshmallows!
Wish me luck.
Melissa

Sharing this idea with friends at:
Tatertots and Jello
A Little Lovely
Skip to my Lou
Tip Junkie

Sue Anne's Chili

David loves his mom's chili above all other chilies. It is one of the recipes he requested that I get from his mom when we first got married. Her Chili, Chicken Divan, and London Broil are at the top of his comfort food list. This is the only recipe I have down so far. Sorry Dave. Sue Anne, I need to get those other recipes from you some time. Holla.

Sue Anne's Chili is simple and delicious. It is slightly soupier than most chilies that I have tried and it has lots and lots of tomatoes in it. I love it. The temperature dropped below 90 degrees here this week, so that means it is chili time.

You are going to want to make Sue Anne's Chili this weekend. It is a perfect fall meal. I'll show you how.

Sue Anne wrote the recipe down for me. I gave her these little chicken recipe cards...Sue Anne loves chickens...and then she sent me a recipe written on one. That's good Karma folks.


I guess now is as good of a time as any to tell you that Sue Anne's name is really Susan. Says it right there on the card. I just call her Sue Anne. I'm not really sure why. No one else calls her that. I didn't feel right calling her Mom or Susan or Mrs. Dark, so I just made up something else to call her. She didn't seem to mind. It takes special people to deal with me.

I'm a nickname-er by nature. Can't help it.

I call David's dad Foy Daddy.

 Again, not his name.

This is Sue Anne's recipe, but I make it a little bit different. I promise you that it is not out of rebellion against my mother in law or that I think I could do it better, but just out of personal preference and laziness. I adjusted the recipe so I only have to use one pot.

Here's what you'll need:


3 28 ounce cans of diced tomatoes
3 28 ounce cans of pinto or kidney beans (personal preference)
3 cans of Rotel
1.5 to 2 pounds of lean ground beef
1 large onion
1 large bell pepper
4 or 5 cloves of garlic
chili powder
garlic salt


You also need a giant pot, because as Sue Anne's recipe states, this makes A LOT of chili. The first time I made it, I was combining all of my ingredients in the largest pot I had and ended up having to cut everything off and go out to buy a bigger pot.

This pot. My chili cookin' pot.

First, dice your onion, bell pepper, and 4 or 5 cloves of garlic. Did you know that you can buy frozen onion and bell pepper that is already all chopped up? Well, you can. I keep both in my freezer just in case I don't have any fresh. Or if I don't feel like chopping or crying over onions. Sometimes I use jarred minced garlic, too. It will be just as good. Don't fret. Just don't tell your foodie friends.


Put the ground beef, onion, pepper, and garlic in your BIG pot on medium high heat until the meat is brown and the onions are tender and translucent. Add a good sprinkling of garlic salt to the mix while it's cooking and you're breaking up your meat. I never cook ground beef without onions...NEVER. It makes the meat taste so much better.

Let the meat get really done. This will add some depth to the chili. The brown burn-y stuff that sticks to the bottom is what makes it slap-yo-mama-in-law good.

I would never slap you, Sue Anne. I promise. But it is good.

Now let's add the tomatoes and Rotel. Now here's Sue Anne's super secret trick to deliciousness. For every can of tomatoes and Rotel that you add, fill that can half full of water and also add that to the chili. Got that?

**Every can of tomato or Rotel + half of that can of water **


Also add the three cans of beans now. Fill only two of those cans half full of water and add it to the pot. See, Sue Anne has this down to a science!

Give everything a good stir and turn the heat up to high...we want to get this boiling!


I've probably called Sue Anne 40 times about this next step. It always makes me nervous, but it's what makes this chili so good. We are going to add half to two thirds of this bottle of chili powder to the pot. Just do it. Trust Sue Anne. She knows what she's doing.

It's ain't called "chili" for nothing.


It's a lot of chili powder. If you have just a small bottle of chili powder (one of the short ones), go ahead and add the whole dag gum thing.

Stir it up and it will turn a wonderful dark chili pepper red. Even with all of this chili powder, this chili recipe is surprisingly mild.


Bring the chili to a boil, stirring often to keep it from sticking to the bottom of the big pot.


Once it reaches a boil, turn the heat down to low and let it simmer for AT LEAST one and a half hours. I cook mine with the lid on for half the time and then with the lid off for the rest of the time, to let the liquid cook down a little.

The longer this cooks the better it tastes! So go outside and play with these guys for while. Take a walk. Clean your house. Watch your Netflix. What ev's.


Now, I like to eat chili with cornbread, but since this is David's favorite and his mom's recipe, I'll show you how he eats Sue Anne's chili.

He starts with a basic bowl of delicious chili. Mmmmm...you could stop right here. This chili can stand on it's own two feet.


Next, he adds a dollop of sour cream...sometimes several dollops. You have to watch Dave.


Then he tops it off with a heaping helping of sharp cheddar cheese and a side of Fritos. Yes, Fritos.


He puts them on the side so they do not get soggy, then adds them to the chili a few at a time while he's eating. He's an expert.

I'd never had the pleasure of eating Fritos in my chili before I met Dave. I doubted it at first, but now I'm a believer.

Invite everyone on the block over and make Sue Anne's chili this weekend. You will not regret it.

And go ahead and have the Fritos, too. It's the proper way to eat it.
Melissa

Sharing this recipe with friends at:


A Crafty Soiree

giveaways

Blogging tips